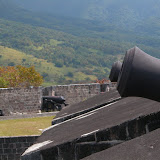
2010年2月27日 星期六

就這樣

live skn:batick+brimstone hill+環島

早上出去玩

晚上去social

早上天氣很差但心情還不錯

晚上有點無聊但氣氛不錯只是心情很幹

就這樣

看照片就對了

2010年2月22日 星期一

黑夫黑夫


chrome的某些部分好像不太穩定
多組帳號登入會出現奇怪的問題
最近宿舍網路相當不穩定
時快時慢
skypeout也是斷斷續續
明明就不像之前是雨季所以訊號不佳...

話說第一次包裹就有種搞的人仰馬翻的感覺阿
而且障礙重重這樣...

最近整個就是諸事不順
除了工作進度持續前進之外其他生活上的事情幾乎都有問題
星期六下午四五點我想說天還沒黑跑去市區找樂器行想要物色一把像樣的吉他
木吉他也行
只要有六條弦可以用彈片彈其他我已經無所謂了...
一路上的黑人知道我在找東西都很好心的替我指引方向
結果騎近小巷裡面被三個比我高的黑人攔下來要錢
才想起來我幾乎已經騎到家教老師警告我們不要靠近的mac kight地區的邊緣了
幸好他們是跟我說他們知道我找的樂器行在哪
給他們五塊他們帶我去
我還有機會可以說不然後騎腳踏車快閃
如果他們當時拉住我的腳踏車
我現在應該就沒辦法在這裡發文了吧...

星期天晚上睡前室友不知道為什麼把全部的燈關掉
平常都照學長的話有留燈的
我想說一個晚上我也懶得去開
結果早上起來鎖在走廊的三台腳踏車有兩台被幹走了
車鎖整個被剪斷丟在地上
超專業的阿王八蛋
八成是觀察很久了
剩下沒被偷的那台車鎖也有被剪過的痕跡
我猜下一步說不定就是準備要闖進來了
今天臨時去在外面的大門加了一個鎖
本來家裡唯一出入的那個門要推沙發去擋
後來想到我把腳踏車牽進來之後有一條車鎖可以把他鎖在門上的鐵框上
就算門鎖全拆了也沒辦法拆車鎖
除非對方又用剪的...

然後假日兩天都有人放火燒甘蔗田
搞的滿天甘蔗灰
全部的餐具都中獎
水也整個超濁

我說你們這些死老黑通通都中猴是吧
互相燒對方的田哪裡好玩阿
有病阿!!! 

2010年2月19日 星期五

course notes

ch1
What is  DPI
Image file format introduction
vector
Bitmap
Png
Gif
Jpg
Bmp
Tiff
How to make a student id card
Layer sense
How to making work path
How to draw a border(selection tool>stroke)
Using tool:
Move tool
Text tool
Shape tool
Selection tool
How to make a Business card
Simply and characteristic
Input the personal photo


How to make a student ID card
Open new file(explan the file format)
717*433px,300dpi
Use rectangle tool to draw a rectangle(color:0.96.131)
Input text”TRAINING COURSE STUDENT CARD”
Set the font TYPE arial,black,size 12pt,leading 11pt,left align
Make it into 2 row after “training course”
Input a picture of st.kitts national flag
Translate it into  RGB color (mode>rgb color)*explain the image mode
use elliptical selection tool to draw a circle(press shift key) around the flag
Right click>make work path
Choose text tool and move to the circle working path,input the text”ST.KITTS NATIONAL ICT CENTER”
Set the text tool box(font:arial,black,size 6pt,tracking -150,sharp,color:white)
Input the name of card holder(font arial,black,size 30pt,color:0.96.131)
Input the course title “Image Design Using Photoshop”(font arial,black,size 6 pt,color:148.148.148)
Make both of above-mentioned sentences right align(2way)
1.chose the layer which we want align then select the selection tool and press right align
2.draw a seleciton area near the place you want align,then select one of layer you want align to the border of select area,then press select>right align,do until finish align whole layer which need align
Finally,input an ICDF logo and put it on suitable palce
Save as jpg file or gif and png file


How to make a Business card
Simply and characteristic
Input the personal photo


ch2

How to make a cd cover
Make a cd disk
Shape tool
Gradient tool
Text tool
Font:tracking
Input image
Layer masking
Hybird layer
invert
Clipping mask
Photofilter
Curves
Brightness/contrast
Cd cover
Background:paint bucket tool
Font:tracking
Import photo>resize
Photofilter
Effects:drop shadow
Input one more photo
Rotate the photo
Blending:drop shadow/stroke
Cd back
Background:paint bucket tool
Font:tracking
Import photo>resize
Photofilter
Effects:drop shadow
Input one more photo
Rotate the photo
Blending:drop shadow/stroke


How to make a cd cover
Make a cd disk
Open a new file(800*800)
Use ellipse select tool to draw a circle selection area,then add a new gradient layer(chose rainbow color,style angle)
Add a new fill layer(solid color:0.100.158),chose hybird mode:color,opacity 75%,then make a clipping mask(right click or press alt then click the line between the layer)
Choose the mask of the gradient fill layer,then use ellipse selection tool to draw a circle selection area.press delete.
When finish delete the content of the center of the circle,the selection area will still exist,so it can be add a new fill layer directly,choose layer >new fill layer>solid color(white)
Then choose the mask of this small circle,draw a new circle inside of this circle
Setting the blending options of the small circle(bevel and emboss: inner bevel,depth 1000%,size 2,soften 2)
Choose the rainbow gradient and setting the belending options as well as the small circle(bevel and emboss: inner bevel,depth 1000%,size 2,soften 2)
Import the photo of cover of disk,copy it into the file,then hide it.
Use ellipse selection tool to draw  a new circle which is small than gradient fill layer,choose the mask of  the small color fill layer right click and choose subtrast mask form seleciotn,then draw a small circle selection area to  subtrast  the center area of the small color fill layer,finally get a new
selection area of disk cover
Add new fill layer(solid color:white,make the hidden layer avalible,then make a clipping mask to the new layer which created a while ago)
Add a photofilter and make a clipping mask to the new layer as well(color:236.222.0,density:37%)
Add a new text layer”ST.kitts”(font:comic sans ms,size:40pt,color:234.207.43)
Add a new text layer “CALYPSO CARNIVAL”,move the second word down to the second row.choose all of them and set it(type arial,black,size 70pt,leading 50pt,horizontal scale 80%,color:234.207.43,bold,strong)


Cd cover
Open a new file (800*800)
Use paint bucket tool to change the color of background(color red).
Input a photo,reduse to suitable size,rotate it to suitable angle,use blending options(drop shadows:distance 10,size 10,stroke:size 15,position inside,opacity 100% ,color white)
input text”ST.KITTS”(font type:comic sans ms,size:24,bold,leading:50,tracking:30,horizontal scale:80% color:234.207.23)
Input text”CALYPSO CARNIVAL”(font:arial,black,size 40,bold,leading 23,vertically scale 82%,horizontal scale 78% color:234.207.23)
Make both of the text align to the center of text ,then choose both of them and select Layer>merge layers or directly press “ctrl+E” Input the photo which used to do the disk cover,move it  down to the text,make a clipping mask
Add a new photo filter layer (color:255.180.1,density 100%), make a clipping mask as well
Set the text layer(blending options>drop shadow:opacity 90%)


Cd back
Open a new file(800*800)
Use paint bucket tool to change the background color(green)
Input the icon of cd,adjust it to the suitable size and suitable palce.
Input the barcode and do the same thing as well as the cd icon,or you can try to downlaod the barcode font form website so that you can create you own barcode.
Open a photo which want use as a new file,use polygon  tool to draw a  star shape(choose paths),then right click>make selection(Feather 10)
Then right click>layer via copy,duplicate the shape to correctly file.
Do the the samething with one more photo,and put it at suitable place.
Input text as track list


ch3
How to make holiday card
With filter library


birthday card1

Input photo of cake
Use magic wand to crop it
Use Filter>artist>poster edges 10.0.6,then right click and select blending options(drop shadow-opacity 100%,angle 93,not use global light,inner shadow-opacity 100%,angle 101)
Use Custom shape tool>colored ribbon ,draw a suitable size then right click>blending options(gradient overlay-color burn,opacity 30%,angle 90,style reflected;pattern overlay:opacity 100%,scale 694;stroke-size:1, color 255.150.0)
Duplicate the layer of ribbon thenput both of them on the suitable palce
Use Custom shape tool to draw a dialog,then right click and choose blending options(drop shadow-opacity 84%,angle 120,not use global light,distance 10,size 24;color overlay-opacity 42%;stroke-size 6,positon outside,opacity 77%,color 255.150.0)
Input the text into thdialog ,set the font(type comics sans ms,regular,size 24,horizontal scale 80%,color 193.9.9,bold,strong)


Birthday card
Input photo
Use quickly wand to crop it
Filter>artist>dry brush 8.7.1
Typing the text
Add a new layer
Draw a spineline using pen tool
Adjust the brush tool,choose maple pattern
Open tool box,setting shape dynamics:pen pressure
Choose color dynamics
Choose pen tool again,right click>stroke path brush simmulate pressure
Delete the path
Add a color filter ,make clipping mask,add a new layer to adjust the hue/saturation
Adjust the text using the font toolbox>create waperd text
Select>all(ctrl+a),select>modify>border>40pixels
Filter>pixelate>color halftone>25pixel
Filter>pixelate>fragment
Close quick mask mode
Layer>new fill layer>solid color


Mother’s day card-cover
//Filter>artistic>paint daubs
Input the photo ,copy as a new layer,hide one of them
Add a new adjustment layer>Color balance(100,-26,-100)
Filter>artistic>fresco(8.8.2)
Blending effects>stroke(size 1,inside),adjust  the size
Hide the small one and show the big one photo
Adjust the size until it  full the screen
Filter>disort>diffuse glow(6.4.15),opacity:90%
Add a new layer,use rectangle tool to draw a rectangle ,fill with white color,opacity:60%
Input text :happy mother’s day(brush script,90pt,242.83.120)
Text effects>drop shadow:opacity:39%,angle:180
Open a new file,imput the photo which we want crop carnation from
Use Quick selection tool to crop it
Duplicate layer to orignal file,then close it.
Put it at suitable place,then using filter>cutout(8,0,2),blenging effects>drop shadow(opacoty:43%,angle 175)


Mother’s day card-back
Copy the carnation photo from last file
Adjust the size to fit the screen
Open a new layer,Use selection tool to select a rectangle,use stroke(5,black,inside),then cancel selection
Open a new layer,use filter>render>cloud,then use filter>render>difference clouds
Press ctrl+f twice to make better effect,then filter>sketch>notepaper(50,8,10)
Add a new adjustment layer>photo filter(255,0,234,density:65%)
Select>all,modify>border(60pixel),select>refine edge(feather40px) open a new fill layer(black)
Select 3 of the layer>make clipping layer
Use line tool to draw a line then copy it 5 times,arrange and group it ,then copy the group again.order it ,un group it ,then select all of the lines and group again


Image processing skill
Enhance color
Basic Concepts:about the level
Bright/contrast
Exposure
Hue/saturation
Curves
Layer hybird mode
Image processing skill
Different tone
Curve
Color balance
Black & white
Photo filter
Invert

Image processing skill
Special skills
Reduce noise
White balance


How to make a poster
Explain the topic and specification
27"×40”or27"×41"
Show a simple example


How to make a poster
Input a major photo,modify it(using layer line dogle)
Clear the word in front of the tip box(qucik mask mode>use brush to draw the area which I don’t need, then hold the selection area,and add new adjustment

layer(hue/saturation),increase the lightness of g(adjust the range form 15/34 to 166\179),
Add a new adjustment layer
curves,RGB(o/p):225/214.211/184.143/97.36/20,RED:216/211.109/123,blue:217/227.133/128.43/36)
Add a new adjustment layer
 (hue/saturation,master:0/27/4)
Add text “our island ourpride” ,the rotate it to suitable position
(font:segoe script,color:208.2.2,size:72,bold,strong,set the leading:54pt,left align,effects:outer glow(opacity:9%,spread:17%,size:43px
Add a new blank layer,chose rectangle tool then draw a rectangle,fill white color,then align the bottom
Add a new text”welcome to st.kitts &nevis”
(font:Copperplate Gotthic bold,color64.152.11,size:26pt,regular,smooth,tracking420,H.scale80%)
Input some photos,make them like a patricular photo(effects:stroke:postion insode,drop shadow angle 12,dno’t use global light,opacity75%)
Use selectiotn tools to choose a rectangle area ,then add a new adjustment layer(curves,rgb:242/214.23/46)
Choose the mask of curves layer then right click “add mask to selection”,then add a new gradient layer(white),put it on the suitable palce.
Add a new text”wish you have a nice trip here!!”(font:segoe script,color:251.161.5,size:26,bold,smooth)


文法通通還沒校正
每一個步驟的圖都還沒截
找時間全部重做一次
還有一張生日卡的note沒寫
image processing skill的實做通通還沒做(平常太常搞了突然要放在課程裡面我還要想想看應該要放哪些才簡單...)

這星期終於有個雛形了
下星期才是重頭戲啊...
教材還沒做完招生的人跟我說報名滿人數了
雖然才區區12個人
在這個地方獻出英文教學的第一次我還是心驚驚啊...
皮要繃緊了

photoshop hotkey

轉自http://www.wretch.cc/blog/simthree/6335143
工具箱(多種工具共用一個快捷鍵的可同時按【Shift】加此快捷鍵選取)
矩形、橢圓選框工具 【M】
裁剪工具 【C】
移動工具 【V】
套索、多邊形套索、磁性套索 【L】
魔棒工具 【W】
噴槍工具 【J】
畫筆工具 【B】
像皮圖章、圖案圖章 【S】
歷史記錄畫筆工具 【Y】
像皮擦工具 【E】
鉛筆、直線工具 【N】
模糊、銳化、塗抹工具 【R】
減淡、加深、海棉工具 【O】
鋼筆、自由鋼筆、磁性鋼筆 【P】
添加錨點工具 【+】
刪除錨點工具 【-】
直接選取工具 【A】
文字、文字蒙板、直排文字、直排文字蒙板 【T】
度量工具 【U】
直線漸變、徑向漸變、對稱漸變、角度漸變、菱形漸變 【G】
油漆桶工具 【K】
吸管、顏色取樣器 【I】
抓手工具 【H】
縮放工具 【Z】
默認前景色和背景色 【D】
切換前景色和背景色 【X】
切換標準模式和快速蒙板模式 【Q】
標準屏幕模式、帶有菜單欄的全屏模式、全屏模式 【F】
臨時使用移動工具 【Ctrl】
臨時使用吸色工具 【Alt】
臨時使用抓手工具 【空格】
打開工具選項面板 【Enter】
快速輸入工具選項(當前工具選項面板中至少有一個可調節數字) 【0】至【9】
循環選擇畫筆 【[】或【]】
選擇第一個畫筆 【Shift】+【[】
選擇最後一個畫筆 【Shift】+【]】
建立新漸變(在”漸變編輯器”中) 【Ctrl】+【N】
文件操作
新建圖形文件 【Ctrl】+【N】
用默認設置創建新文件 【Ctrl】+【Alt】+【N】
打開已有的圖像 【Ctrl】+【O】
打開為... 【Ctrl】+【Alt】+【O】
關閉當前圖像 【Ctrl】+【W】
保存當前圖像 【Ctrl】+【S】
另存為... 【Ctrl】+【Shift】+【S】
存儲副本 【Ctrl】+【Alt】+【S】
頁面設置 【Ctrl】+【Shift】+【P】
打印 【Ctrl】+【P】
打開“預置”對話框 【Ctrl】+【K】
顯示最後一次顯示的“預置”對話框 【Alt】+【Ctrl】+【K】
設置“常規”選項(在預置對話框中) 【Ctrl】+【1】
設置“存儲文件”(在預置對話框中) 【Ctrl】+【2】
設置“顯示和光標”(在預置對話框中) 【Ctrl】+【3】
設置“透明區域與色域”(在預置對話框中) 【Ctrl】+【4】
設置“單位與標尺”(在預置對話框中) 【Ctrl】+【5】
設置“參考線與網格”(在預置對話框中) 【Ctrl】+【6】
設置“增效工具與暫存盤”(在預置對話框中) 【Ctrl】+【7】
設置“內存與圖像高速緩存”(在預置對話框中) 【Ctrl】+【8】
編輯操作
還原/重做前一步操作 【Ctrl】+【Z】
還原兩步以上操作 【Ctrl】+【Alt】+【Z】
重做兩步以上操作 【Ctrl】+【Shift】+【Z】
剪切選取的圖像或路徑 【Ctrl】+【X】或【F2】
拷貝選取的圖像或路徑 【Ctrl】+【C】
合並拷貝 【Ctrl】+【Shift】+【C】
將剪貼板的內容粘到當前圖形中 【Ctrl】+【V】或【F4】
將剪貼板的內容粘到選框中 【Ctrl】+【Shift】+【V】
自由變換 【Ctrl】+【T】
應用自由變換(在自由變換模式下) 【Enter】
從中心或對稱點開始變換 (在自由變換模式下) 【Alt】
限制(在自由變換模式下) 【Shift】
扭曲(在自由變換模式下) 【Ctrl】
取消變形(在自由變換模式下) 【Esc】
自由變換復制的像素數據 【Ctrl】+【Shift】+【T】
再次變換復制的像素數據並建立一個副本 【Ctrl】+【Shift】+【Alt】+【T】
刪除選框中的圖案或選取的路徑 【DEL】
用背景色填充所選區域或整個圖層 【Ctrl】+【BackSpace】或【Ctrl】+【Del】
用前景色填充所選區域或整個圖層 【Alt】+【BackSpace】或【Alt】+【Del】
彈出“填充”對話框 【Shift】+【BackSpace】
從歷史記錄中填充 【Alt】+【Ctrl】+【Backspace】
圖像調整
調整色階 【Ctrl】+【L】
自動調整色階 【Ctrl】+【Shift】+【L】
打開曲線調整對話框 【Ctrl】+【M】
在所選通道的曲線上添加新的點(‘曲線’對話框中) 在圖像中【Ctrl】加點按
在復合曲線以外的所有曲線上添加新的點(‘曲線’對話框中) 【Ctrl】+【Shift】
加點按
移動所選點(‘曲線’對話框中) 【↑】/【↓】/【←】/【→】
以10點為增幅移動所選點以10點為增幅(‘曲線’對話框中) 【Shift】+【箭頭】
選擇多個控制點(‘曲線’對話框中) 【Shift】加點按
前移控制點(‘曲線’對話框中) 【Ctrl】+【Tab】
後移控制點(‘曲線’對話框中) 【Ctrl】+【Shift】+【Tab】
添加新的點(‘曲線’對話框中) 點按網格
刪除點(‘曲線’對話框中) 【Ctrl】加點按點
取消選擇所選通道上的所有點(‘曲線’對話框中) 【Ctrl】+【D】
使曲線網格更精細或更粗糙(‘曲線’對話框中) 【Alt】加點按網格
選擇彩色通道(‘曲線’對話框中) 【Ctrl】+【~】
選擇單色通道(‘曲線’對話框中) 【Ctrl】+【數字】
打開“色彩平衡”對話框 【Ctrl】+【B】
打開“色相/飽和度”對話框 【Ctrl】+【U】
全圖調整(在色相/飽和度”對話框中) 【Ctrl】+【~】
隻調整紅色(在色相/飽和度”對話框中) 【Ctrl】+【1】
隻調整黃色(在色相/飽和度”對話框中) 【Ctrl】+【2】
隻調整綠色(在色相/飽和度”對話框中) 【Ctrl】+【3】
隻調整青色(在色相/飽和度”對話框中) 【Ctrl】+【4】
隻調整藍色(在色相/飽和度”對話框中) 【Ctrl】+【5】
隻調整洋紅(在色相/飽和度”對話框中) 【Ctrl】+【6】
去色 【Ctrl】+【Shift】+【U】
反相 【Ctrl】+【I】
圖層操作
從對話框新建一個圖層 【Ctrl】+【Shift】+【N】
以默認選項建立一個新的圖層 【Ctrl】+【Alt】+【Shift】+【N】
通過拷貝建立一個圖層 【Ctrl】+【J】
通過剪切建立一個圖層 【Ctrl】+【Shift】+【J】
與前一圖層編組 【Ctrl】+【G】
取消編組 【Ctrl】+【Shift】+【G】
向下合並或合並聯接圖層 【Ctrl】+【E】
合並可見圖層 【Ctrl】+【Shift】+【E】
蓋印或蓋印聯接圖層 【Ctrl】+【Alt】+【E】
蓋印可見圖層 【Ctrl】+【Alt】+【Shift】+【E】
將當前層下移一層 【Ctrl】+【[】
將當前層上移一層 【Ctrl】+【]】
將當前層移到最下面 【Ctrl】+【Shift】+【[】
將當前層移到最上面 【Ctrl】+【Shift】+【]】
激活下一個圖層 【Alt】+【[】
激活上一個圖層 【Alt】+【]】
激活底部圖層 【Shift】+【Alt】+【[】
激活頂部圖層 【Shift】+【Alt】+【]】
調整當前圖層的透明度(當前工具為無數字參數的,如移動工具) 【0】至【9】
保留當前圖層的透明區域(開關) 【/】
投影效果(在”效果”對話框中) 【Ctrl】+【1】
內陰影效果(在”效果”對話框中) 【Ctrl】+【2】
外發光效果(在”效果”對話框中) 【Ctrl】+【3】
內發光效果(在”效果”對話框中) 【Ctrl】+【4】
斜面和浮雕效果(在”效果”對話框中) 【Ctrl】+【5】
應用當前所選效果並使參數可調(在”效果”對話框中) 【A】
圖層混合模式
循環選擇混合模式 【Alt】+【-】或【+】
正常 【Ctrl】+【Alt】+【N】
閾值(位圖模式) 【Ctrl】+【Alt】+【L】
溶解 【Ctrl】+【Alt】+【I】
背後 【Ctrl】+【Alt】+【Q】
清除 【Ctrl】+【Alt】+【R】
正片疊底 【Ctrl】+【Alt】+【M】
屏幕 【Ctrl】+【Alt】+【S】
疊加 【Ctrl】+【Alt】+【O】
柔光 【Ctrl】+【Alt】+【F】
強光 【Ctrl】+【Alt】+【H】
顏色減淡 【Ctrl】+【Alt】+【D】
顏色加深 【Ctrl】+【Alt】+【B】
變暗 【Ctrl】+【Alt】+【K】
變亮 【Ctrl】+【Alt】+【G】
差值 【Ctrl】+【Alt】+【E】
排除 【Ctrl】+【Alt】+【X】
色相 【Ctrl】+【Alt】+【U】
飽和度 【Ctrl】+【Alt】+【T】
顏色 【Ctrl】+【Alt】+【C】
光度 【Ctrl】+【Alt】+【Y】
去色 海棉工具+【Ctrl】+【Alt】+【J】
加色 海棉工具+【Ctrl】+【Alt】+【A】
暗調 減淡/加深工具+【Ctrl】+【Alt】+【W】
中間調 減淡/加深工具+【Ctrl】+【Alt】+【V】
高光 減淡/加深工具+【Ctrl】+【Alt】+【Z】
選擇功能
全部選取 【Ctrl】+【A】
取消選擇 【Ctrl】+【D】
重新選擇 【Ctrl】+【Shift】+【D】
羽化選擇 【Ctrl】+【Alt】+【D】
反向選擇 【Ctrl】+【Shift】+【I】
路徑變選區 數字鍵盤的【Enter】
載入選區 【Ctrl】+點按圖層、路徑、通道面板中的縮約圖
濾鏡
按上次的參數再做一次上次的濾鏡 【Ctrl】+【F】
退去上次所做濾鏡的效果 【Ctrl】+【Shift】+【F】
重復上次所做的濾鏡(可調參數) 【Ctrl】+【Alt】+【F】
選擇工具(在“3D變化”濾鏡中) 【V】
立方體工具(在“3D變化”濾鏡中) 【M】
球體工具(在“3D變化”濾鏡中) 【N】
柱體工具(在“3D變化”濾鏡中) 【C】
軌跡球(在“3D變化”濾鏡中) 【R】
全景相機工具(在“3D變化”濾鏡中) 【E】
視圖操作
顯示彩色通道 【Ctrl】+【~】
顯示單色通道 【Ctrl】+【數字】
顯示復合通道 【~】
以CMYK方式預覽(開關) 【Ctrl】+【Y】
打開/關閉色域警告 【Ctrl】+【Shift】+【Y】
放大視圖 【Ctrl】+【+】
縮小視圖 【Ctrl】+【-】
滿畫布顯示 【Ctrl】+【0】
實際像素顯示 【Ctrl】+【Alt】+【0】
向上卷動一屏 【PageUp】
向下卷動一屏 【PageDown】
向左卷動一屏 【Ctrl】+【PageUp】
向右卷動一屏 【Ctrl】+【PageDown】
向上卷動10 個單位 【Shift】+【PageUp】
向下卷動10 個單位 【Shift】+【PageDown】
向左卷動10 個單位 【Shift】+【Ctrl】+【PageUp】
向右卷動10 個單位 【Shift】+【Ctrl】+【PageDown】
將視圖移到左上角 【Home】
將視圖移到右下角 【End】
顯示/隱藏選擇區域 【Ctrl】+【H】
顯示/隱藏路徑 【Ctrl】+【Shift】+【H】
顯示/隱藏標尺 【Ctrl】+【R】
顯示/隱藏參考線 【Ctrl】+【;】
顯示/隱藏網格 【Ctrl】+【”】
貼緊參考線 【Ctrl】+【Shift】+【;】
鎖定參考線 【Ctrl】+【Alt】+【;】
貼緊網格 【Ctrl】+【Shift】+【”】
顯示/隱藏“畫筆”面板 【F5】
顯示/隱藏“顏色”面板 【F6】
顯示/隱藏“圖層”面板 【F7】
顯示/隱藏“信息”面板 【F8】
顯示/隱藏“動作”面板 【F9】
顯示/隱藏所有命令面板 【TAB】
顯示或隱藏工具箱以外的所有調板 【Shift】+【TAB】
文字處理(在”文字工具”對話框中)
左對齊或頂對齊 【Ctrl】+【Shift】+【L】
中對齊 【Ctrl】+【Shift】+【C】
右對齊或底對齊 【Ctrl】+【Shift】+【R】
左/右選擇 1 個字符 【Shift】+【←】/【→】
下/上選擇 1 行 【Shift】+【↑】/【↓】
選擇所有字符 【Ctrl】+【A】
選擇從插入點到鼠標點按點的字符 【Shift】加點按
左/右移動 1 個字符 【←】/【→】
下/上移動 1 行 【↑】/【↓】
左/右移動1個字 【Ctrl】+【←】/【→】
將所選文本的文字大小減小2 點像素 【Ctrl】+【Shift】+【<】 將所選文本的文字大小增大2 點像素 【Ctrl】+【Shift】+【>】
將所選文本的文字大小減小10 點像素 【Ctrl】+【Alt】+【Shift】+【<】 將所選文本的文字大小增大10 點像素 【Ctrl】+【Alt】+【Shift】+【>】
將行距減小2點像素 【Alt】+【↓】
將行距增大2點像素 【Alt】+【↑】
將基線位移減小2點像素 【Shift】+【Alt】+【↓】
將基線位移增加2點像素 【Shift】+【Alt】+【↑】
將字距微調或字距調整減小20/1000ems 【Alt】+【←】
將字距微調或字距調整增加20/1000ems 【Alt】+【→】
將字距微調或字距調整減小100/1000ems 【Ctrl】+【Alt】+【←】
將字距微調或字距調整增加100/1000ems 【Ctrl】+【Alt】+【→】
選擇通道中白的像素(包括半色調)【Ctrl】+【Alt】+【1~9】

2010年2月17日 星期三

windows XP standard font list

為什麼要知道這個呢
因為我常常要用不一樣的電腦做設計
帶上自己習慣的字型是必然
不過如果可以善用每台電腦的字型應該更方便


Arial
Arial Black
Arial Bold
Arial Bold Italic
Arial Italic
Comic Sans MS
Comic Sans MS Bold Courier 10,12,15
Courier New
Courier New Bold
Courier New Bold Italic
Courier New Italic
Estrangelo Edessa
Franklin Gothic Medium
Italic
Gautami
Georgia
Georgia Bold
Georgia Bold Italic
Georgia Italic Impact
Latha
Lucida Console
Lucida Sans Unicode
Microsoft Sans Serif
Modern MS Sans Serif 8,10,12,14,18,24
MS Serif 8,10,12,14,18,24
Mv Boli
Palatino Linotype
Palatino Linotype Bold
Palatino Linotype Bold Italic
Palatino Linotype Italic
Roman
Script
Small Fonts
Symbol
Symbol 8,10,12,14,18,24
Tahoma
Tahoma Bold
Times New Roman
Times New Roman Bold
Times New Roman Bold Italic
Times New Roman Italic
Trebuchet MS
Trebuchet MS Bold
Trebuchet MS Bold Italic
Trebuchet MS Italic
Tunga
Verdana
Verdana Bold
Verdana Bold Italic Verdana Italic
Webdings
WingDings
WST_Czech
WST_Engl
WST_Fren
WST_Germ
WST_Ital
WST_Span
WST_Swed 

windows VISTA standard font list

我的電腦裡面有930套中英文字型
結果我連原本內建的都搞不清楚...

Aharoni Bold
Andalus
Angsana New
Angsana New Bold
Angsana New Bold Italic
Angsana New Italic
AngsanaUPC
AngsanaUPC Bold
AngsanaUPC Bold Italic
AngsanaUPC Italic
Arabic Typesetting
Arial
Arial Black
Arial Bold
Arial Bold Italic
Arial Italic
Batang
BatangChe
Browallia New
Browallia New Bold
Browallia New Bold Italic
Browallia New Italic
BrowalliaUPC
BrowalliaUPC Bold
BrowalliaUPC Bold Italic
BrowalliaUPC Italic
Calibri
Calibri Bold
Calibri Bold Italic
Calibri Italic
Cambria
Cambria Bold
Cambria Bold Italic
Cambria Italic
Cambria Math
Candara
Candara Bold
Candara Bold Italic
Candara Italic
Comic Sans MS
Comic Sans MS Bold
Consolas
Consolas Bold
Consolas Bold Italic
Consolas Italic
Constantia
Constantia Bold
Constantia Bold Italic
Constantia Italic
Corbel
Corbel Bold
Corbel Bold Italic
Corbel Italic
Cordia New
Cordia New Bold
Cordia New Bold Italic
Cordia New Italic
CordiaUPC
CordiaUPC Bold
CordiaUPC Bold Italic
CordiaUPC Italic
Courier
Courier New
Courier New Bold
Courier New Bold Italic
Courier New Italic
DaunPenh
David
David Bold
DFKai-SB
DilleniaUPC
DilleniaUPC Bold
DilleniaUPC Bold Italic
DilleniaUPC Italic
DokChampa
Dotum
DotomChe
Estrangelo Edessa
EucrosiaUPC
EucrosiaUPC Bold
EucrosiaUPC Bold Italic
EucrosiaUPC Italic
Euphemia
FangSong
Franklin Gothic Medium
Franklin Gothic Medium Italic
FrankRuehl
FreesiaUPC
FreesiaUPC Bold
FreesiaUPC Bold Italic
FreesiaUPC Italic
Gautami
Georgia
Georgia Bold
Georgia Bold Italic
Georgia Italic
Gisha
Gisha Bold
Gulim
GulimChe
Gungsuh
GungsuhChe
Impact
IrisUPC
IrisUPC Bold
IrisUPC Bold Italic
IrisUPC Italic
Iskoola Pota
JasmineUPC
JasmineUPC Bold
JasmineUPC Bold Italic
JasmineUPC Italic
KaiTi
Kalinga
Kartika
KodchiangUTC
KodchiangUTC Bold
KodchiangUTC Bold Italic
KodchiangUTC Italic
Latha
Leelawadee
Leelawadee Bold
Levenim MT
Levenim MT Bold
LilyUPC
LilyUPC Bold
LilyUPC Bold Italic
LilyUPC Italic
Lucida Console
Lucida Sans Unicode
Malgun Gothic
Malgun Gothic Bold
Mangal
Meiryo
Meiryo Bold
Meiryo Bold Italic
Meiryo Italic
Microsoft Himalaya
Microsoft JhengHei
Microsoft JhengHei Bold
Microsoft Sans Serif
Microsoft Uighur
Microsoft YaHei
Microsoft YaHei Bold
Microsoft Yi Baiti
MingLiU
MingLiU-ExtB
MingLiU_HKSCS
MingLiU_HKSCS-ExtB
Miriam
Miriam Fixed
Modern
Mongolian Baiti
MoolBoran
MS Gothic
MS Mincho
MS PGothic
MS PMincho
MS Sans Saerif
MS Serif
MS UI Gothic
MV Boli
Narkisim
NSimSun
Nyala
Palatino Linotype
Palatino Linotype Bold
Palatino Linotype Bold Italic
Palatino Linotype Italic
Plantagenet Cherokee
PMingLiU
PMingLiU-ExtB
Raavi
Rod
Roman
Script
Segoe Print
Segoe Print Bold
Segoe Script
Segoe Script Bold
Segoe UI
Segoe UI Bold
Segoe UI Bold Italic
Segoe UI Italic
Shruti
SimHei
Simplified Arabic
Simplified Arabic Bold
Simplified Arabic Fixed
SimSun
SimSun-ExtB
Small Fonts
Sylfaen
Symbol
Tahoma
Tahoma Bold
Times New Roman
Times New Roman Bold
Times New Roman Bold Italic
Times New Roman Italic
Traditional Arabic
Traditional Arabic Bold
Trebuchet MS
Trebuchet MS Bold
Trebuchet MS Bold Italic
Trebuchet MS Italic
Tunga
Verdana
Verdana Bold
Verdana Bold Italic
Verdana Italic
Vrinda
Webdings
Wingdings

2010年2月14日 星期日

準備啟程的鞋子

live skn:daily pieces


最近更新網誌跟相簿不太頻繁阿
不頻繁就算了
還沒什麼內容
本來想說今天整天不出門宅在家
應該可以做點正經事
結果現在都已經凌晨一點半
連張圖都沒修到
倒是不小心看了一部分台灣最近吵的頗熱的電影艋舺
看起來還不錯
哎呀
不是我不進電影院支持國片
我人在國外阿
就讓我接受網路上熱心分享的大大的好意吧
明天晚餐來一口氣看完吧

另外也把獵16給看完了
劇情還是差不多亂
而且說實在我不太欣賞這種拿時事加進作品裡面的橋段
跟另外一本書"後青春期的詩"的開頭一樣
聽說今年他的主力會集中在拍電影
我想這樣也好
要是真的拍出來我大概無論如何都會去電影院看吧
前提是要在我回台灣之後才上檔...


再睜開眼睛去上班又要開始趕工教材了
這星期預定要rehearsal
到底趕不趕得及阿...


我又把總司令的錄影機忘了

2010年2月13日 星期六

本命年

等下準備要過海外的第一個農曆新年了
一點也沒有要過年的感覺阿
不會冷、沒有年節音樂
..................重點是沒有紅包
雖然我好像已經過了可以拿紅包的年紀

台灣好像又變冷了
聽說台灣現在是走夏天跟冬天快速變換的路線
上星期有26度這星期寒流就來了剩十幾度這樣
島上的居民是說
這裡的天氣理論上二月份應該不會那麼熱
.......這是意味著等七月八月會更熱嗎

總之
最可怕的事情是
沒有初五開工前面四天開開心心躲在家看電視吃吃喝喝這種東西
初一星期天放完假初二星期一大家就得正常上班啦
結果跟我在打工的時候差不多嘛
一樣沒假可放要賺錢...
那個大老闆是不是要來付一下倍薪阿 


聽說本命年虎年要安太歲不然會雖
好死不死我幾乎整個虎年都不會在台灣
算了
反正也沒好運過
沒差啦XD
小心點比較實在

2010年2月7日 星期日

巨大蟻丘

live skn:newton ground


早上本來想早起
結果睡到11點才起來
好吧
是比昨天早一小時
慵懶的喝了一杯咖啡邊整理了一些資料
下午就出門去位在newton ground的新農場參觀
順便到新農場工頭他家去吃小林先生煮的
島上傳說中最好吃的台灣牛肉麵
新農場在島的比較北端
所以我們坐了二三十分鐘的車才到
看起來新農場好像還要很長一段時間才會有點樣子阿
現在去那邊只看到一堆土跟一堆草...
參觀完新農場我們又回到工頭家去準備享用小林先生的牛肉麵


在吃晚餐之前我們幾個跑到海邊去晃晃
挖了一些海砂
還差點迷路
而且往海邊的一路上都有牛
有些頭上還有長角
一臉就是"你們再過來老子就把你撞飛回台灣"的表情
我是挺想回去啦
不過我想舒服的坐飛機回去...
而且好死不死我們三個人裡面有一個穿紅色
害我很緊張那些牛不知道哪時候體內的鬥牛血統會覺醒...

幸好我們最後平安的拿到沙子回到工頭家
享用了超道地的牛肉麵
夭壽
根本比我在台灣吃過的所有牛肉麵都好吃耶
難怪大家從我們來就一直提到小林先生的牛肉麵有多好吃
今天可是親自驗證了
吃飽飯之後大家又玩了一會domino跟撲克牌
九點多才各自回家


睡醒又是另外一個忙碌的星期一阿


....話說
我們三個好像都把準備明天中午的便當這件事給忘了耶

一層又一層


一晃眼又是一段時間沒有正常的發網誌了
當初還想說一天發一篇文好像很容易
想不到一忙起來還是變成週記或月報...
星期六早上食品加工有海地賑災的義賣
所以雖然我不小心睡過頭還是跑去贊助了一點點微薄的心意
中午跑去吃了上星期去的那間bar
因為上星期去的時候故著講電話
都沒有仔細試試看他們的ribs跟rotti的味道
所以跟兩個室友又去了一次
那邊氣氛還頗好的
吃飽飯回到宿舍沒多久jack也回來了
而且還很興奮的告訴我他剛剛去吃飯的時候看到有一間店在賣levis
而且只要69美元或是160ec
我算了算
...不管是換美元或換ec都不到兩千
當然是馬上收拾東西就衝出去看了
那邊賣的都是美國的款式
編號是6開頭的
5開頭的只有經典的501排扣款
我抓了一件原色藍跟一件黑色試完之後出來跟店員說我兩件都要還把帶我去的jack嚇了一大跳
他叫我要冷靜
不過我是覺得在台灣501應該隨便都超過兩千
所以怎麼買也是划算
雖然他最小腰圍是30...........離我的26腰頗遙遠
不過反正是低腰褲
而且最近體重有明顯上升的趨勢(媽咧我來這裡兩個月胖五公斤是怎樣 過太好了...要命)
所以還是買了
經過一番殺價之後店方賣我們一件50美金
哈哈哈哈我的媽阿
一千五一件阿
我一直都覺得島上物價這麼高來
這邊我應該可以克制不亂買
存點錢回台灣
可是怎麼剛好我喜歡的東西都反而便宜阿...
總之
下次還要去看其他款式
加上踢不爛在這邊也比台灣便宜

基本經典款450ec
換台幣是5千多
便宜台灣快兩千
還有早期的款式只要兩三百ec的...
看來回台灣說不定還是兩個行李箱滿滿的回去了

2010年2月5日 星期五

解決chrome過度占用記憶體的方法

有沒有效果我還在測試啦
只是有感於chrome一口氣可以吃掉我1.5G的記憶體(我開了兩個chrome裡面各有2.30個網頁)
造成電腦速度嚴重DELAY而且一直告訴我資源不足
只好拜辜狗大神尋求指示
找到的資料上面寫說chrome目前有新增一個purge memory的功能
使用的方式是在chrome的捷徑裡面按右鍵>內容
找到捷徑那個頁籤
在目標位置的最後面按空白後貼上--purge-memory-button
希望可以發揮一點效用

話說這年頭不管哪個瀏覽器好像都是這副德性
IE也是 FF也是(好像比較少一點) OPERA也是 SAFARI也差不多
好像FF跟OPERA狀況比較好一點就是了

對啦
記憶體很便宜啦
可是吃到1.5G會不會太兇殘了....

2010年2月4日 星期四

嗚咽

live skn:majors bay珊珊來遲的太陽
因為離拍照當天實在有點久了
我也懶得補文章
就直接貼在這裡吧


等下躺下去睡再醒來就星期五了
一眨眼二月份的第一星期也要結束了
怎麼還一屁股的事情沒做阿
比欠債還恐怖了現在

這個月一樣過的飛快
然後前幾天兩個月份的薪水也一口氣進帳了
拿到1600多美金真是開心
我只有把一半換ec
另外一半仍然還是美金
一來美金將來回台灣也好換
二來美金在portzante買某些東西便宜超多的...

生活上面現在基本上沒有任何問題了
畢竟錢都拿到了應該沒什麼難以解決的事情
至於工作上
某些角度來說我大概已經看懂過去可能發生什麼狀況了
甚至現在就已經可以跟學長前輩們先道歉關於自己當初的莽撞
不過因為我仍然在嘗試某些東西
所以還是等到離開這裡的時候會有個比較正式一點的心得
這個島阿
什麼都好
就是人不好
幾個人就足夠把大環境搞的烏煙瘴氣的了...

好了
現在倒數八個月啦
希望下一次發文不會是倒數七個月開始的時候XD


诶我說那個現在在倫敦的某人
到時候時間到想回來就趕快回來阿
大家都在等你耶

家教時間3

結果竟然只有家教時間這種無聊的主題才能準時發文...
今天問了一些寫信的東西
因為最近必須寫英文信跟當地人交涉
所以一開始研究了一些關於信中的涵義
後來又做了一些文法的練習
看一看那些內容有點像是台灣國中程度的文法
很想跟他說這些對我太簡單
不過想想也許她還在測試我的程度到哪才會從簡單的下手
就先再觀察一陣子
然後文法練習完了就是看新聞
這次看的是跟醫學有關的新聞
一狗票生字阿...

put measures=going to arrange
還提到了很多正式跟口語的句子的差異
...一時之間突然想不起來
還是看單字吧

incidences 發病率
annual 年度
approximately 大約
cervix 子宮頸
uterus 子宮
colon 結腸
prostate 前列腺
commemorating 紀念
aim 目標
awareness 意識
encourage 鼓勵
prevention 預防
chronic 慢性
priority 優先
pap (兒童或病人吃的)軟食,流食
smears 塗片
mammography 乳腺
endoscopy 內窺鏡
routinely 定期
taught 教
radiation 輻射
chemotherapy 化療
assure 保證
allocate 分配
Meanwhile 與此同時
evidence 證據
consumption 消費
obesity 肥胖
hypertension 高血壓
immunisation 免疫接種
prevention 預防
Hepatitis 肝炎
vaccinations 疫苗接種
Papilloma 乳頭狀瘤
cervical 頸椎

2010年2月2日 星期二

家教時間2

.....連家教內容都可以隔這麼久才寫阿
上課的第二週老師帶了文法的書來
跟我玩文字填空遊戲
真是好懷念
這次複習的是動詞過去式
如果被以前教過我的英文老師知道我英文退步到動辭三態忘光光
我應該會被揍死吧

use...for 用在...身上
bend 彎腰 過去式bent
hop 單腳跳(人)雙腳跳(動物) 過去式hopped
bring 過去式broght
claim 宣稱
sob 啜泣 過去式sobbed
brocast 播送
sweep 掃地...這個字我很眼熟但想不起來是啥 查字典才想到這個是掃弦的英文名字XD


我看我真的該去找個動詞三態表出來複習一下了...
這幾天在寫英文MAIL跟當地的人交涉
到時候上課應該又有東西可以討論了吧...